Restoring and Installing Old Original Salvaged Wood on Ceiling
Restoring and installing old original salvaged wood on our laundry room ceiling was a labor of love and worth all the effort!
As we shared earlier, Nate salvaged and was restoring our original hardwood floors from our renovations. But, he also took down the original wood from the ceiling in our laundry room, which was actually an addition to the house. We saved that as well because we could tell that it was older wood, but it may not have been from the 1930’s~ we’re not really sure.
After salvaging the old ceiling wood from the laundry room, he also restored it and cleaned it up so that we could reuse it and put it back up. The final showcase of the project turned out so great!

PREPPING LAUNDRY ROOM FOR SALVAGED WOOD CEILING
Before he put up the old restored salvaged wood on the ceiling, he had to prep the actual room.

Since new drywall was already hung in this area, he worked on taping and filling in the cracks. Nate’s dad explained to him to use little strips of drywall to cover up large gaps on the wall. Especially because not every corner is even in older houses, which is why you might have bigger gaps when hanging the drywall.

Then he covered it up with some Durabond, which acts as like a hard drywall mud, but it’s not used for taping and only to fill in the large gaps.
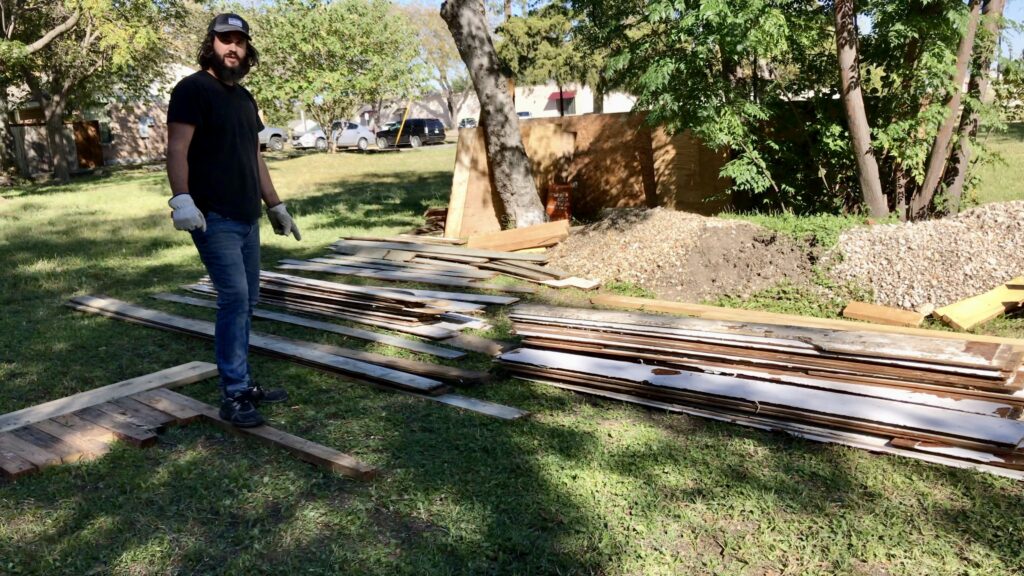
ORGANIZING OLD SALVAGED WOOD
As he planned out how to install the salvaged wood on the ceiling, he laid it all out to organize it.
There were a few pieces missing and some of the wood was really warped and could be unusable. He went through it all to see what he could actually salvage and use to place back on the laundry room ceiling.
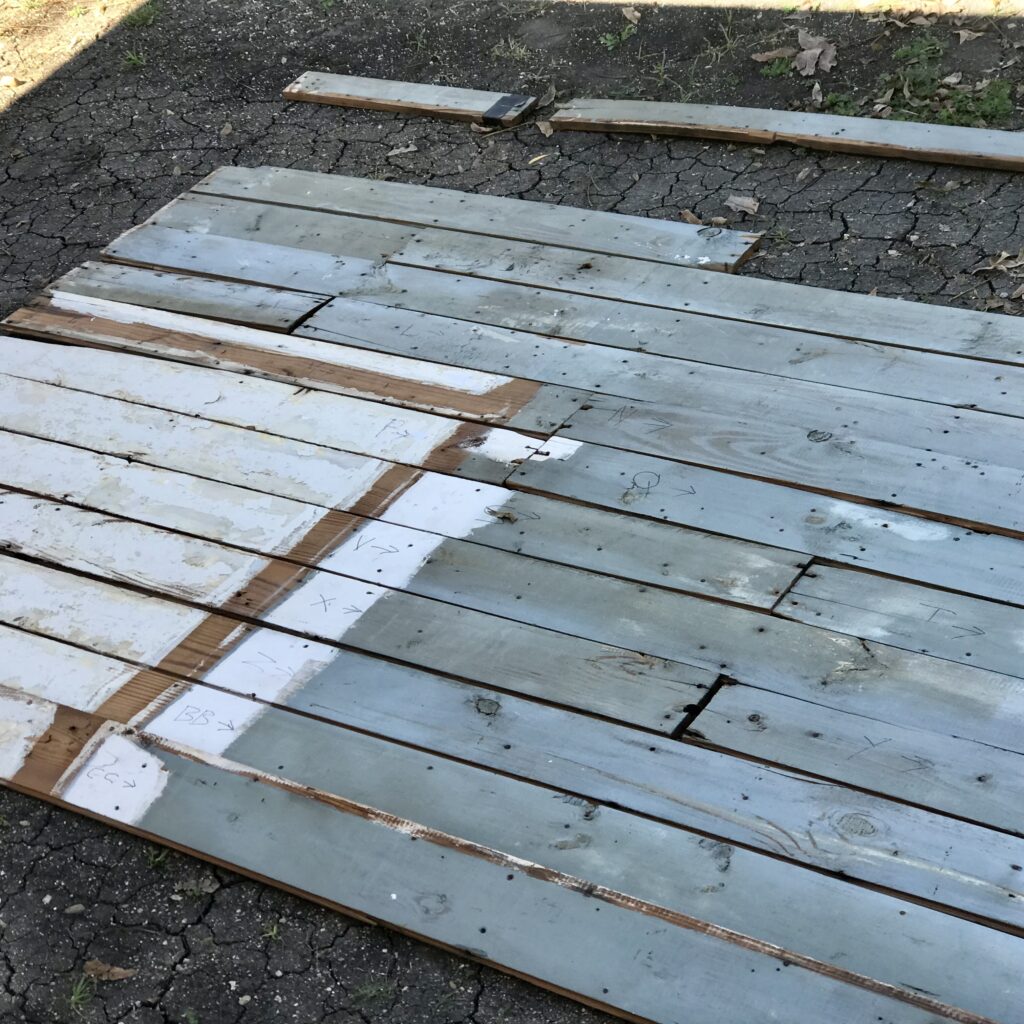
The hope was to have enough to finish the ceiling. He would make it work!
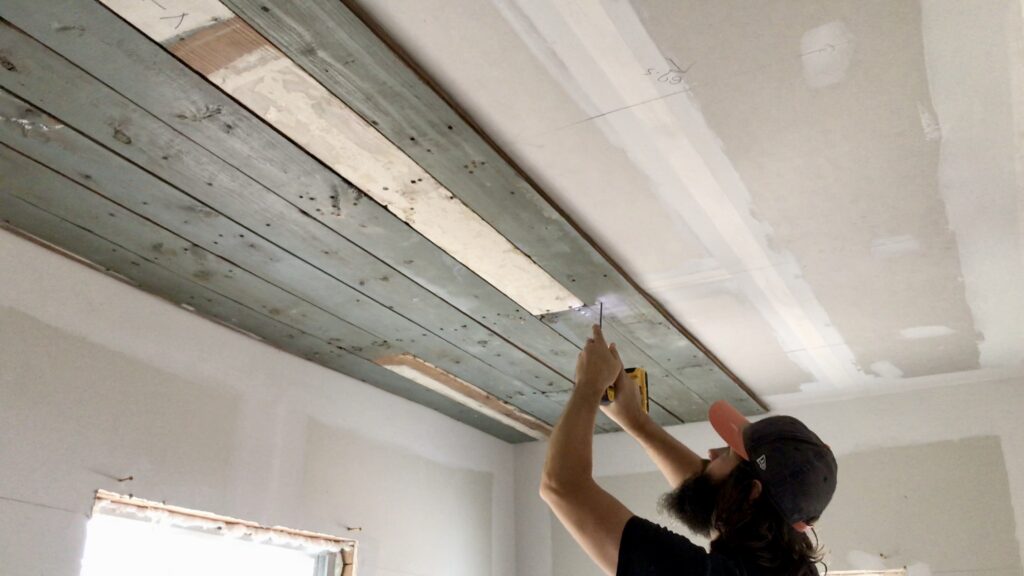
INSTALLING OLD SALVAGED WOOD ON CEILING
He was able to finally start installing the wood on the ceiling drywall. The first board was the hardest to get on because he wanted to make sure everything was even and lined up with the center of the ceiling. Then he was hoping it would go more smoothly with the other pieces.
He also had to cut out the HVAC duct with his Dewalt multi tool. Then he filled in the drywall holes that were originally cut out for the light fixtures with the same sized drywall circle pieces. He was planning to move the light fixtures inward a bit on both sides to make them even and centered with the window and bathroom door facing the laundry room.
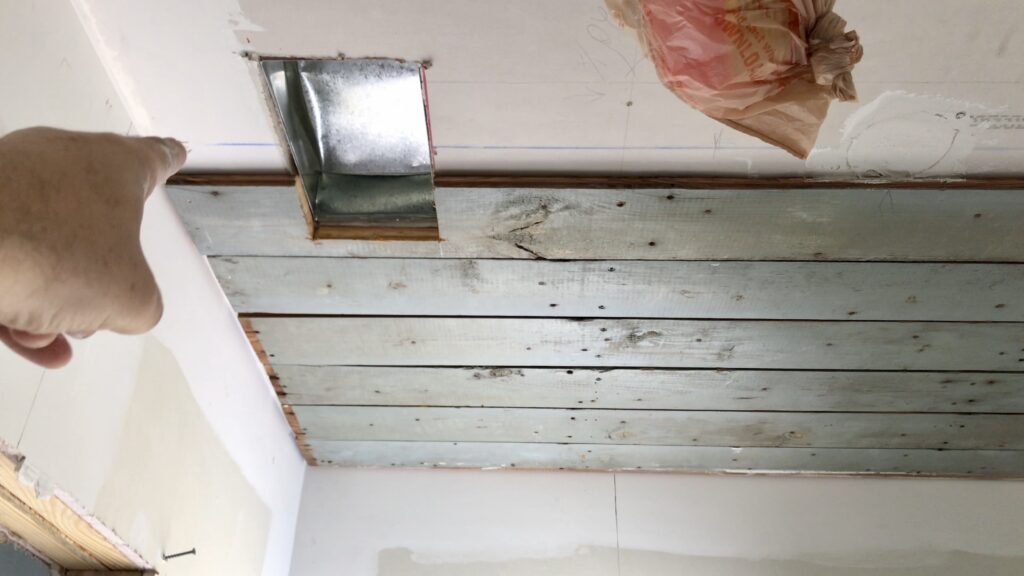
ORIGINAL OLD SALVAGED WOOD
The ceiling wood was original to the house. When he initially gutted the whole house and tore out the drywall on the ceiling, the wood was underneath it.

This time he flipped it and put the drywall on first, then the original wood on the outside of it so all of its beauty and splendor could be displayed! That way we could actually see it as it was hidden under the drywall.
CEILING PAINT AND LIGHT FIXTURES
Now we had to decide on what paint color to go with. We are thinking we’ll go with white, but haven’t quite tackled that as of yet.
He also installed recessed light fixtures since they are flush with the wood on the ceiling. Since this is a more utility functioning room, he didn’t want any tools, brooms, and such to hit any dangling light fixtures in there. So in essence, no vintage or antique chandeliers in that room!

REUSING OLD SALVAGED MATERIALS
It’s amazing how you can take something old that normally you would think in a renovation would be ripped out and thrown out, but then restore it and reuse it. Then you’re not having to go out and buy new materials. You can just use the materials you had by just freshening it up a bit.

And now, it’s like, we have a “brand new” ceiling! Eventually, we’ll also have “brand new” (air quotes) old floors. There is just character and I think just originality in that. In maintaining the original nature of the house. Instead of just putting in a bunch of modern materials.
REPLACING OLD WOOD WHEN NECESSARY
Now I know there is a need for modern materials at times because even some of our old siding on this little pine cottage was so rotted and we could not restore it. We had found a lumber store nearby that sold the same type of Dutch lap siding that we originally had on the house. So, we had to go and purchase new siding for that. Not for the entire house though, but certain parts where we had to replace the unsalvageable pieces.


I could see how this would be something you have to consider and decide if it was worth restoring or not. Like if there was no hope or ability to. If the wood was so rotted and so far gone that you really did have to toss it at that point. And that’s when our bulk pickup in the past has come in very handy!
It’s not like we have everything completely restored, but as much as we could, we have tried. It is also such a rewarding process when you do start to see things going up after they have been restored. But, then you do look back and are like, wow~ that was a lot of work!
CREATIVE PROJECTS SALVAGING WOOD
I would say for us, it has been worth it, but maybe not for everyone as time is money. But for us, this has kinda become our creative art project at the same time. And maybe we are taking a lot longer.. Actually, we are taking a lot longer than anyone else probably would. Unless they have a passion and love to restore something old and have the patience to do so. I don’t think that everybody does necessarily, but it is something that has really drawn our attention.

We would find ourselves on weekends driving to local historical or heritage districts nearby to just get ideas and to see these older homes preserved. And it just kinda like gives us a warm fuzzy feeling. Like this is a bit of history that we get to be a part of and it’s really exciting. It’s become kinda this new unique thing that we’ve really been into lately.

Proverbs 24:3
Through wisdom a house is built, and by understanding it is established.

CHECK OUT OUR VIDEOS
Thanks for joining us on this journey! We hope that you will find inspiration watching us learn as we go while we’re attempting to renovate and rebuild this old small historic cottage mostly on our own. Stay tuned for more progress updates ahead!
You can also watch a video about this here.
To see more adventures of our tiny fixer upper journey, click on the links below.
💪🏼 CHALLENGES INSTALLING OUR ANTIQUE CLAWFOOT TUB 🛁
🏚 COTTAGE RENOVATIONS AND LEARNING HOW TO GARDEN LOCALLY 👩🏻🌾🌱


