The Framing is Now Exposed and Making Design Plans
The framing is now exposed in this tiny fixer upper and we start making design plans for the house! But, we ran into a little problem that newbies like us didn’t know about – building permits from the city! We’ll get to that in a bit.
We were supposed to move into the house in about a month, but there was no way that was going to happen! However, we have made a lot of progress.
Isaiah 66:1
Thus says the Lord:
Heaven is My throne, And earth is My footstool.
Where is the house that you will build Me?
And where is the place of My rest?
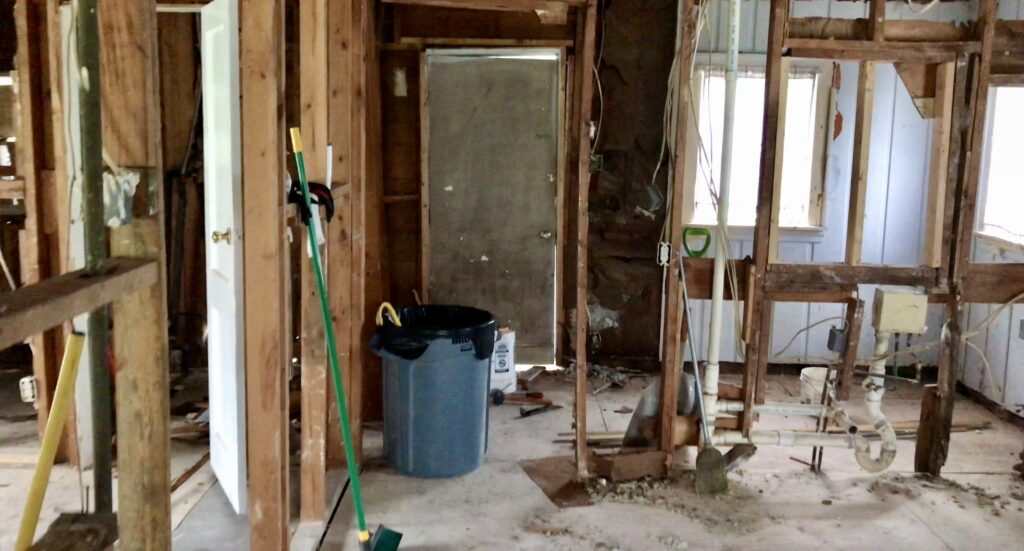
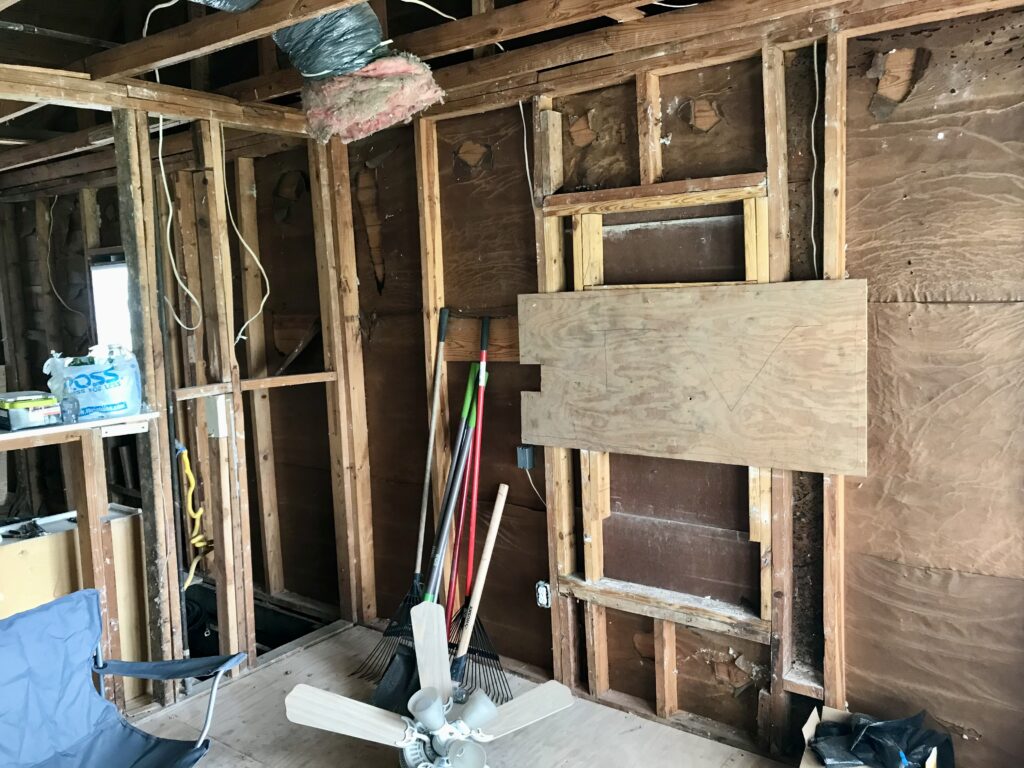
Now that most of the drywall and insulation has been removed, the frame of the house was exposed. That becomes the next project. But, before we can tackle that, Nate has to gut the laundry room and finish that up.
Getting THE LAUNDRY AREA down to the framing
Nate plans to take out all the frames around the windows in the laundry area as well as the walls and the ceiling too. He says it’s a cool celling, but is not sure what’s above it and he wanted it to be done right.

Now that he removed the walls, he plans to remove the insulation as well, but first he wants to take the ceiling out. He went through and labeled every board because he wants to try to reuse it if possible. Not sure how well it will come out. But, ya know, old wood is pretty cool!

He removes the wood on the ceiling, which looks like it could be the original wood. Hopefully we can salvage it for reuse later.
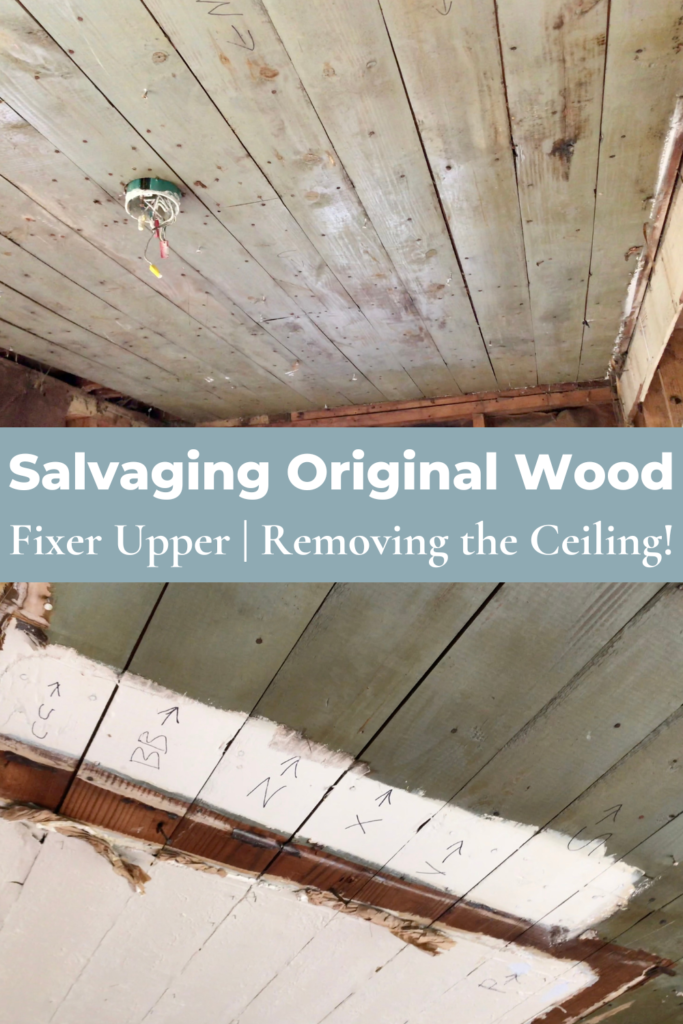
We started to really get into old wood and things that were original to the house. It’s like opening up a time capsule or something!
This is where he labeled all the old wood so that he could organize it better later.
REMOVING NAILS FROM SALVAGED WOOD AND THE EXPOSED FRAMING
It’s a new day and a mess in the house so Nate decides to clean it up a bit before he does much more work. One thing he needs to do is remove nails from any of the boards he’s going to keep. There are piles of wood all over our tiny fixer upper.

Nate sets up and organizes a little station where he can remove nails from the old original wood that we were intending to save and reuse.
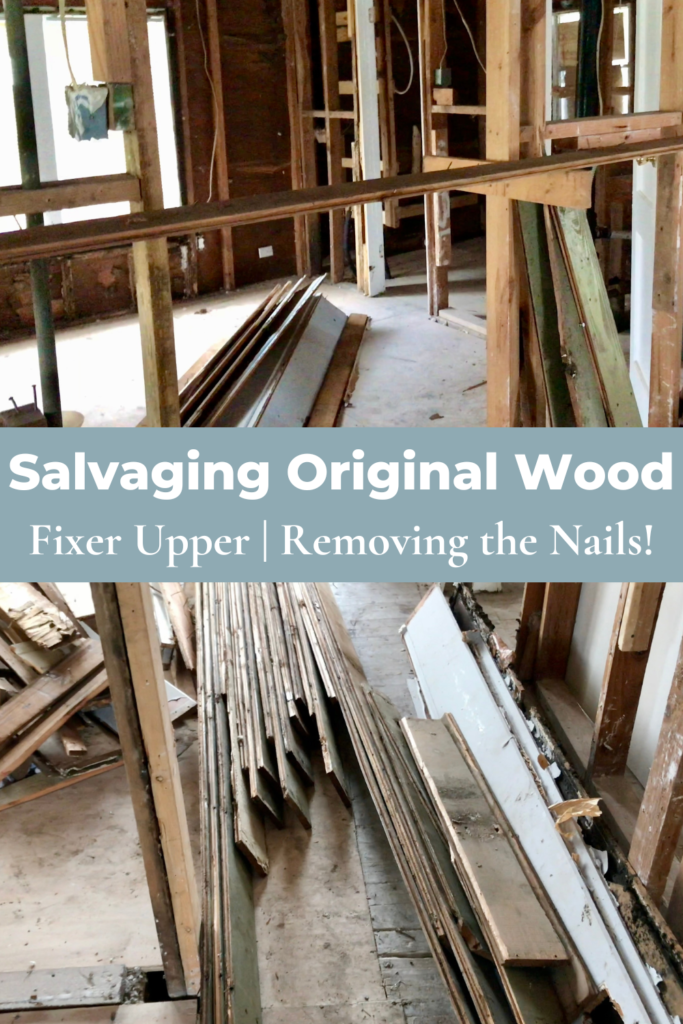
He set up this cool little station where he can stand up and pound the nails through. And the awesome thing about this station is that it’s very level. He bought a level and it shoots a laser beam through the house for him to get the level just right. Then he screwed in these 2×4’s in the framing so that the board he places on top sits perfectly level on it for him to remove the nails.
Nate compares his nail removing station to my stand up desk at home for the office work I do remotely for my corporate job. I love standing while I’m working!
His little station served him well for this project. And on the floor is all the wood with nails removed and ready for safe keeping until we need them later.

Now he can store the planks of wood in the garage much more easily and keep them very tidy. Not only do we have a tiny house, but we also have a TINY garage. We’ve got to get creative with storage around here, but we don’t want to leave any old original wood behind, if possible. And don’t worry, the organization in the garage gets much better! This photo shows the beginning of our efforts to organize the wood.
FRAMING EXPOSED AND CHALLENGES
Nate points out rotted wood at the bottom of the bathroom and kitchen framing since we can now see past the drywall, insulation, and vapor barrier. We will have to work on those next.


We’re also hoping to take the wall out that separates the kitchen from the living room to have a larger room for both and open concept feel.
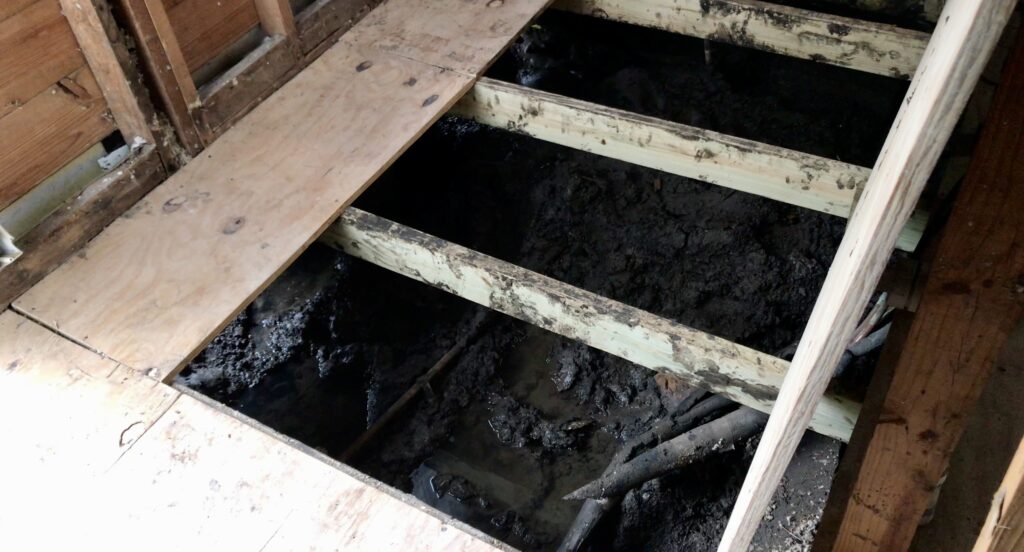
There was a lot of water in the backyard from the rain that caused it to leak under the foundation! Not good! Nate will also have to fix all this. It’s really bad!

Nate turns on the sump pump and it starts to fill up. Whoa… That’s so sad! We just had some of the wood replaced and foundation repairs done. It was sucking a lot of water out from our foundation.

At least we were helping out the little birdies to have a drink of water and their bath! They were such unique and beautiful birds. Incredible nature right in the middle of an urban oasis.

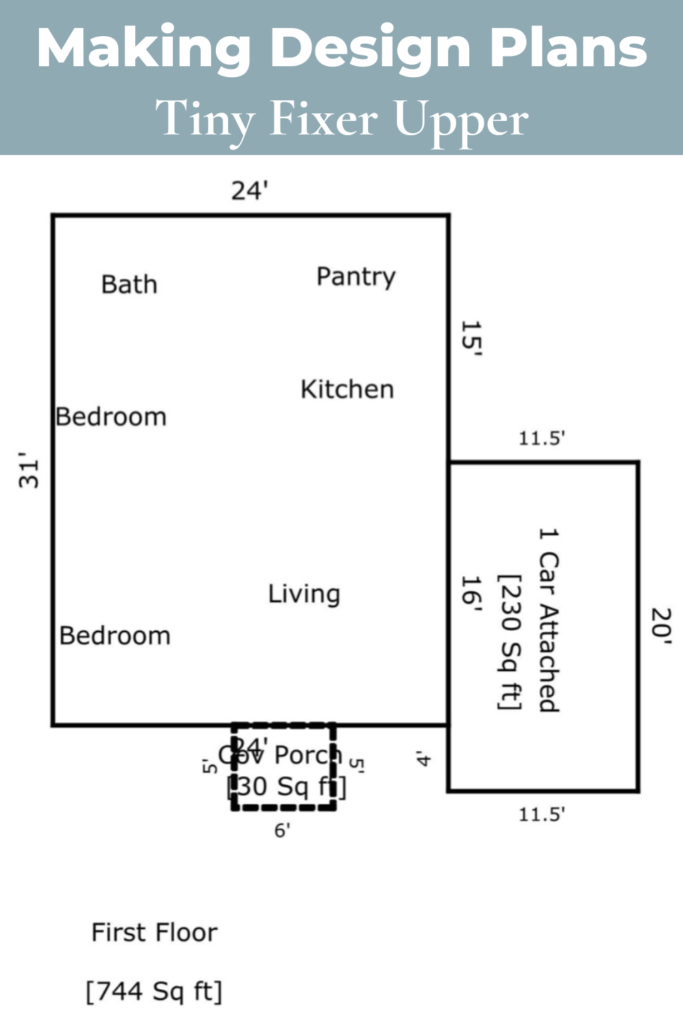
MAKING DESIGN PLANS – LIVING ROOM
I was thinking we could possibly place the tv where the front living room windows are. Nate thought it would block the entire window and we could possibly hang it on the wall connected to our attached garage. Since we will have an open concept between our kitchen and living room, he said I could even watch tv while I was cooking, depending on where we decided to put the stove.
Then he thought another place to hang the tv was on the wall in the living room connected to the office. That even when we opened the door we would still have enough room. Those were a couple options we could consider.

It was fun to process how we would reframe the house, make changes, and where we would place things like our furniture and appliances. We really had no idea what we should do or what we were doing. And sometimes felt like maybe we needed an expert to help us out or something. But, we are cheap and tried to figure it out as best as we could on our own.
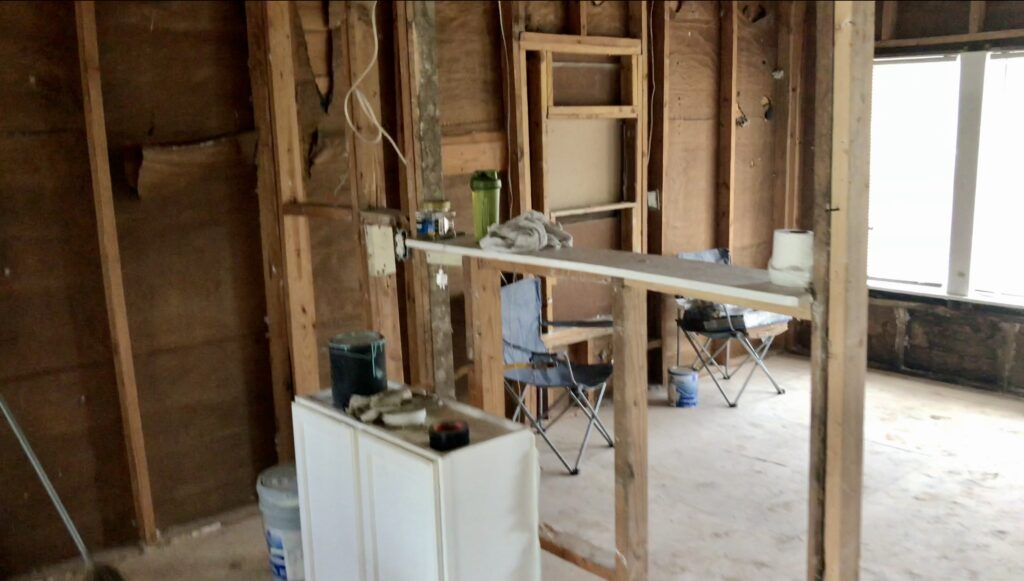
It’s like Nate stripped the whole house down to its skeleton – the framing. As I look around, its as if all the rooms at this point were hard to picture, but knew that it would eventually come together. Hopefully!
MAKING DESIGN PLANS – LAUNDRY ROOM
In the laundry room, I tried to picture where the washer and dryer would go. We decided to put them in front of the window instead of the wall connecting to the kitchen on the right. Seems like a much better spot right under the window. That way they would be pushed all the way toward the back of the room and leave more space for other storage or shelves.

Nate thinks they will be higher than the bottom of the window and may cover part of the window, but that was fine to me. Otherwise, we could swap out the window for a smaller one. Maybe. I really didn’t mind it blocking the window if it was just a bit. I also want a board to go across the washer and dryer to use as a folding and sorting station.
framing and design plan permits
Remember the problem that I shared in the beginning that newbies like us didn’t know about? Well, let me tell you about our experience with that!
Did you know that when you are doing renovations on your house, you actually need to apply for a building permit from the city? Yea, so.. I know that every city may be a little bit different on how they handle permits and building inspections, but we had no clue about this whole process!
Yea, remember, we’re new at this and we don’t know what we’re really doing. We’re kinda just flying by the seat of our pants here and trying to figure things out with no experience. This was a huge wake up call for us and we will get to those stories in the future so stay tuned as we unpack all of those things that we actually had to do with our city as well. Not to mention the heritage commission as we are also in a historic district!
Nate was really trying to figure out what we wanted before he submitted our plans for the permit application. He wished that we had a kitchen and bath person to help us out.
So this is where Nate starts to sketch out our plans a bit so that we can begin the process of applying for our permit. Keep in mind, our plans changed over and over and over again! Watch this video to see a lot more of the handmade sketches!


CLEANING AROUND THE EXPOSED FRAMING
Nate cleared up everything that was in the ceiling area. There were several pieces of plywood on top of the ceiling that were nailed down, but he removed them because they were very flimsy and he wanted the access to the ceiling area. Later we can put down more sturdy plywood.

Then he went through the framing and vacuumed every single crack and crevice, removing all the old insulation everywhere in the whole place.

Finally, he went through the tiny fixer upper and cleaned everything up and vacuumed. And he also had to figure out how to stop the water from coming in the house!
CHECK OUT OUR VIDEOS
Thanks for joining us on this journey! We hope that you will find inspiration watching us learn as we go while we’re attempting to renovate and rebuild this old small historic home mostly on our own. Stay tuned for more progress updates ahead!
You can also watch a video about this here.
To see more adventures of our tiny fixer upper journey, click on the links below.
RIPPING OUT DRYWALL AND INSULATION IN TINY FIXER UPPER
TEARING DOWN DRYWALL AND REMOVING INSULATION ALONE IN FIXER UPPER


