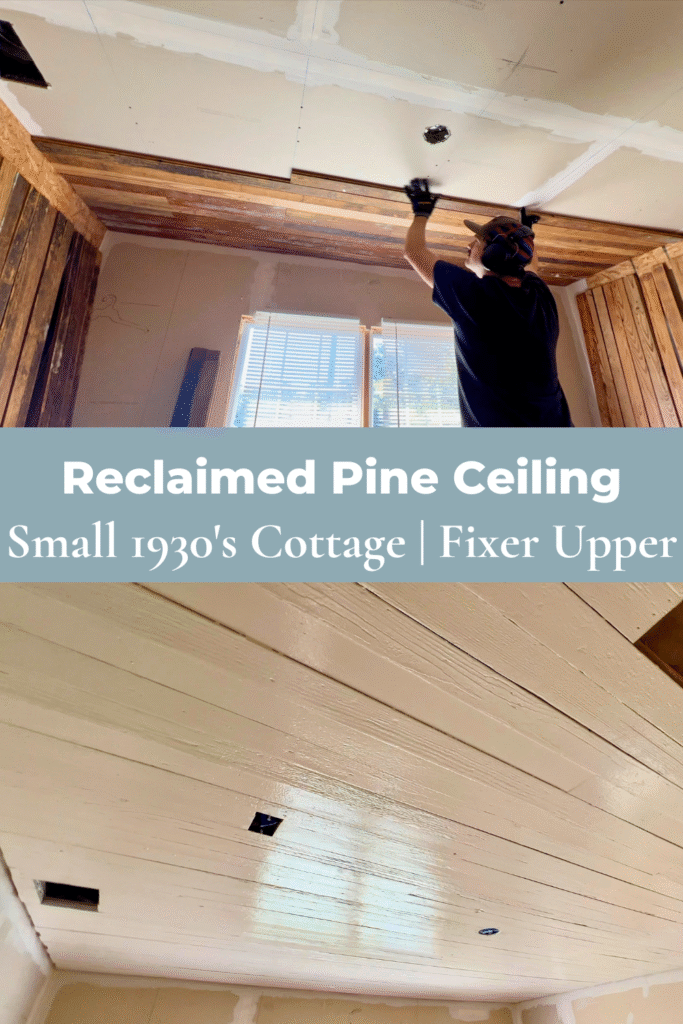
Installing Free Reclaimed Pine Flooring on 1930’s Cottage Ceiling
Installing free reclaimed pine flooring on our 1930’s cottage ceiling continued to add historic charm to our small dwelling.
RECLAIMED COTTAGE FLOORING
The flooring was one of the first projects we worked on when we bought this little fixer upper. We ripped out the modern looking cheap vinyl flooring so that we could check on the condition of the foundation and then decide what kind of flooring we wanted to use.
Our realtor said that there was probably plywood underneath the vinyl flooring, but we actually ended up finding a special treasure. The original wood flooring! We didn’t expect that but were hoping to find those gems and we did.
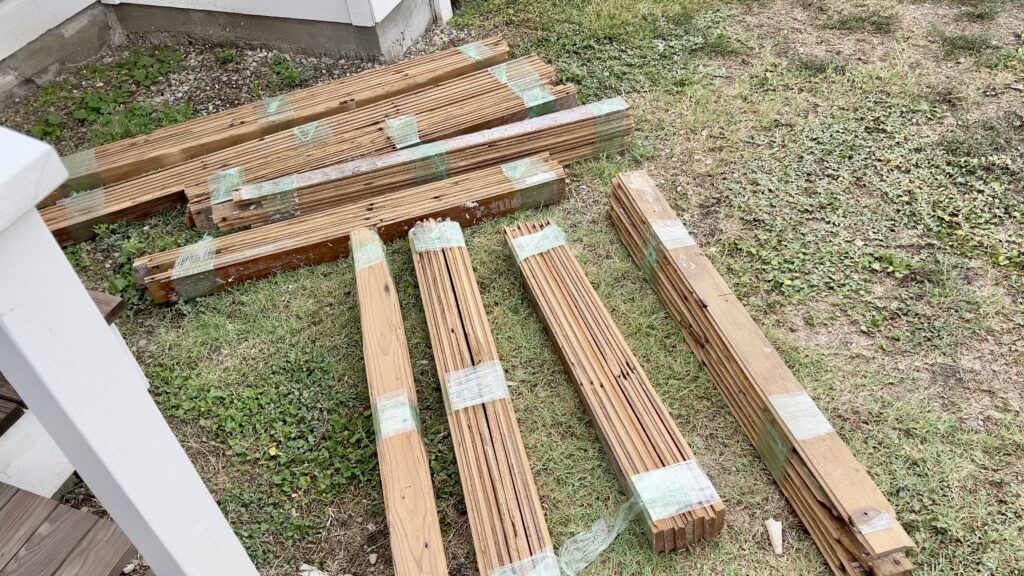
The problem was that a lot of it was damaged and moldy. So we could only salvage some of it and not enough to actually redo the flooring in our house. Then we ended up finding free old growth pine flooring on Facebook Marketplace that fits the time period of our house. It was quite the job to pick it all up and drive it back home, but it was so worth it.
We planned to use that free reclaimed wood for all of our flooring. So, we used some of our original flooring and the free flooring to accent our office ceiling. A nice bit of historic preservation where ever we could find a place for it.
PREPPING RECLAIMED FLOORING
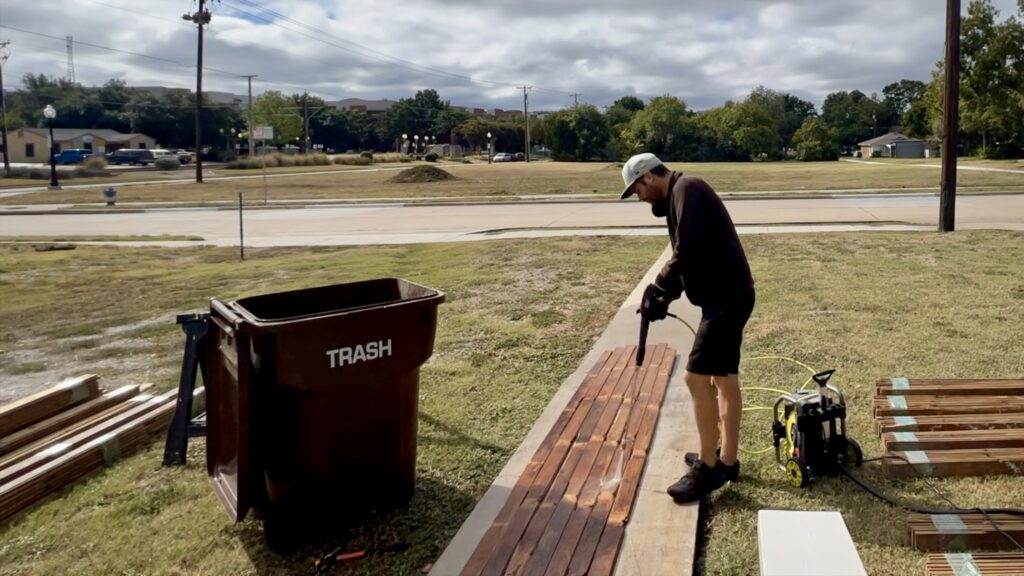
Nate worked on power washing the original flooring and made sure that all the nails were removed from them to prep for the project. He has cleaned and salvaged so much reclaimed wood at this point. Sometimes I feel like he’s earned the title~ The Salvage King!
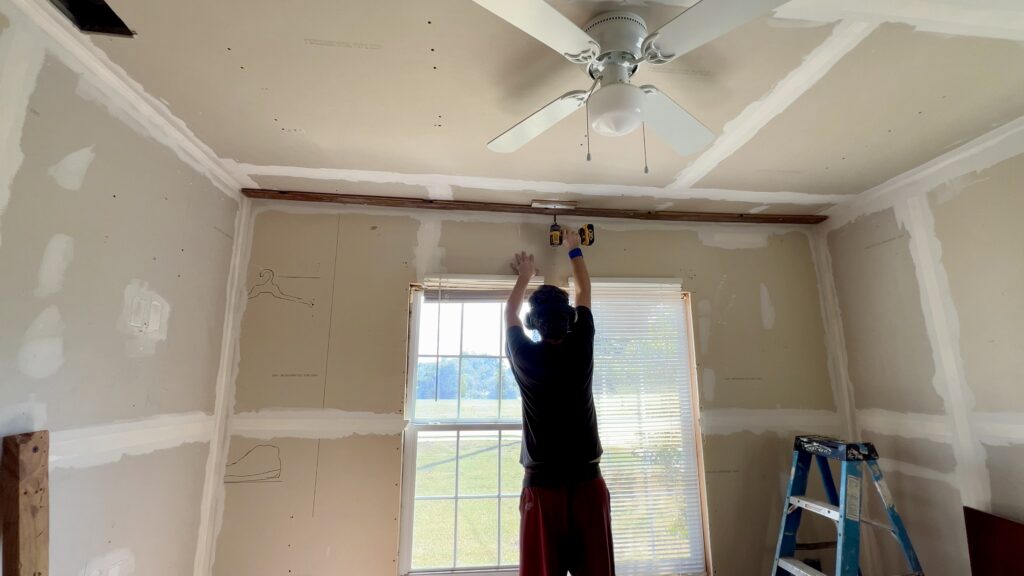
Then he worked on drywall mudding taping in the office to prepare it for the wood install. For this project we would install the wood flooring on the ceiling. But, we also had plans to install wood on the walls as well. Instead of just having them be regular drywall walls. More to come on that.

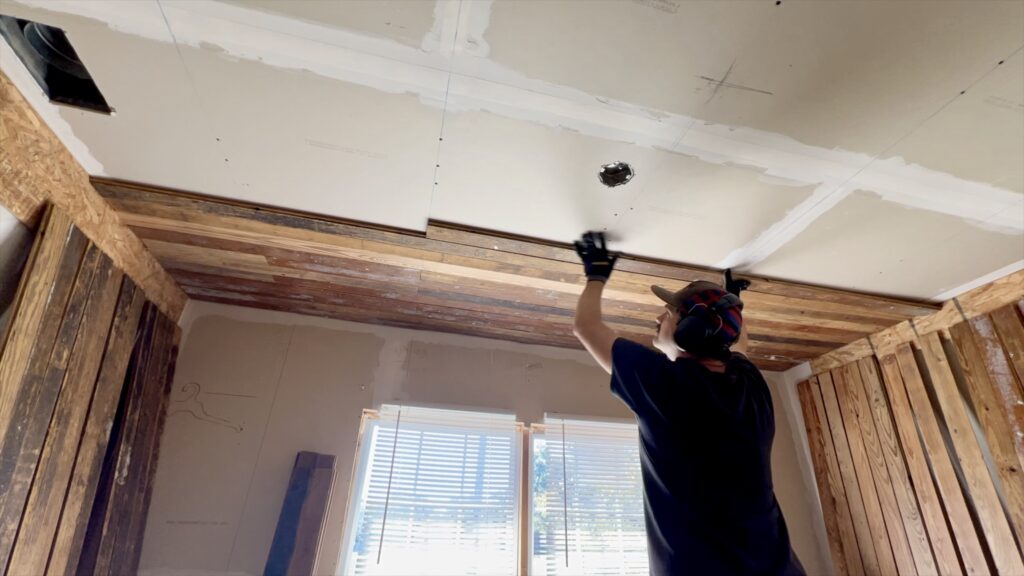
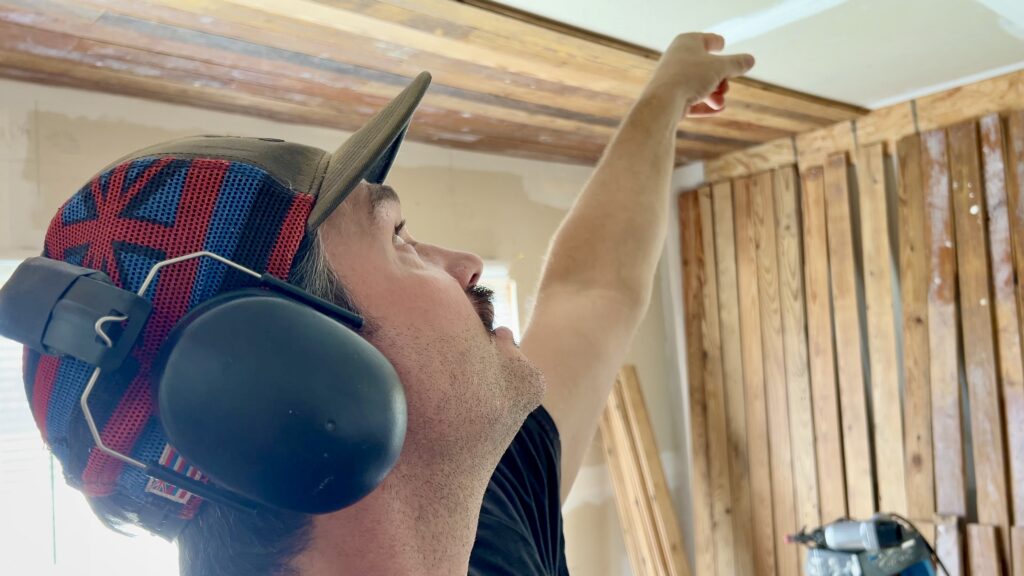
INSTALLING RECLAIMED FLOORING ON CEILING
After the flooring was prepped and cleaned, they were ready to be installed on the ceiling. We used some of the original flooring we could salvage from our own house and some of it also came from the free reclaimed wood we picked up. Both around 1930’s to 1940’s wood.
It has felt so great to preserve a bit of history in our home and not have to buy new materials. Or just have plain drywall in a historic little cottage. We have been so blessed to come across so many salvaged gems to include in our renovations. Rebuilding a new old home is what it seems like. And it feels like such a great accomplishment.
Nate had to make sure he cut the flooring to fit the ceiling. You know that saying, measure twice and cut once? Make sure you follow that if you are working on a similar project. Because my hubby realized after trying to install the first piece of wood that the length was too long. He had to remove it and cut it down more. Then start all over installing it. But, now that you’ve read this~ you won’t be making that same mistake (I hope)!
He simply used a nail gun and cordless drill to install the planks of reclaimed wood to the ceiling. You should watch our video to see how he actually did it in more detail. We show him installing plank after plank of wood so you get the idea of how it’s done.
PRIMING AND PAINTING FLOORING ON CEILING
Although we are not experts or know how to share a real tutorial, we hope this will give you some ideas. Especially since we are just using whatever we’ve salvaged and making the most of it. Cheers to sparking some inspiration for your own diy projects similar to this. We’ve certainly learned a lot from others doing their own projects and desire to give back in this small way.
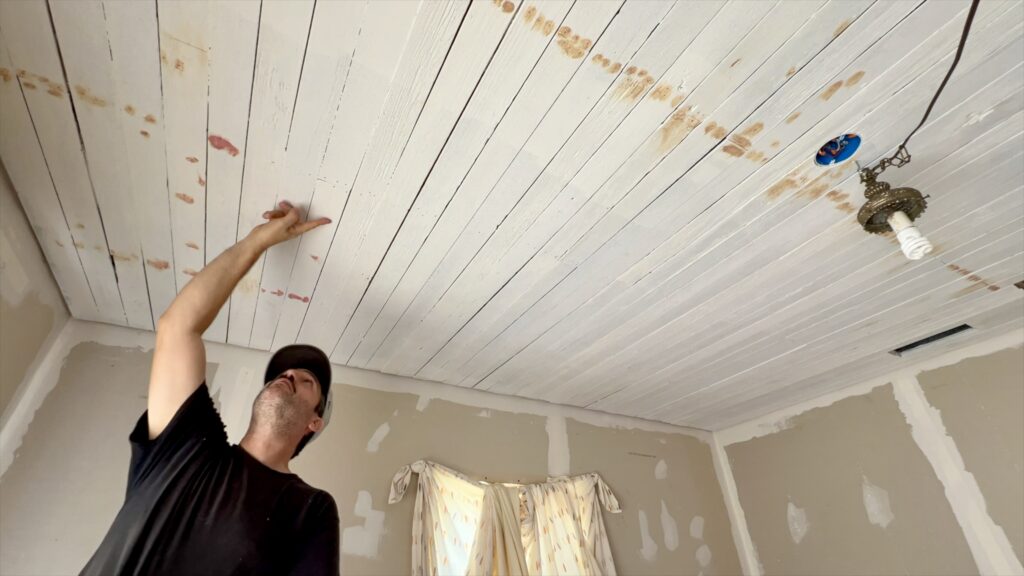
At first we weren’t sure if we wanted to oil the wood on the ceiling or paint it. We seem to always be faced with that decision. Usually we think we’ll preserve the wood look and oil it, then we end up painting it.
Can you guess what we ended up doing? We painted it! But, don’t worry, there will be enough wood exposed in many places all over our cottage. Can’t wait to do the final house tour soon when all these renovations are completed!
We used oil based primer first since we were working with old reclaimed wood. It seems to stick and adhere to older wood better. At least that’s what we’ve heard. We learned our lesson when we had to repaint our house because we used water based primer first. But, that is also starting to peel up again. Not sure if it’s because of the hot Texas sun or if oil based or water based primer is better. In any case, we used oil based primer.
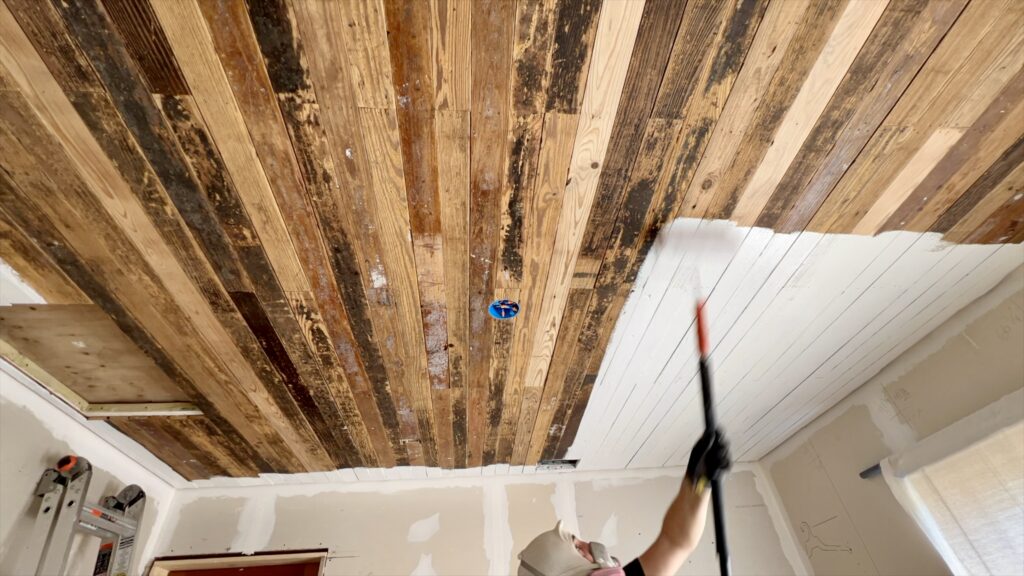
Then Nate went through and added wood filler to any holes in the wood. For instance from nails or anything else and sanded it down. And finally he used a water based paint as the last coat. He usually applies two coats of paint for a nice lasting finish.
Installing free reclaimed pine flooring on our 1930’s cottage ceiling and painting it gave it wonderful character and charm.
CHECK OUT OUR VIDEOS
Thanks for joining us on this journey! We hope that you will find inspiration watching us learn as we go while we’re attempting to renovate and rebuild this old small historic cottage mostly on our own~ while working full time jobs! Stay tuned for more progress updates ahead. Read more about us here.
You can also watch a video about this here.
To see more adventures of our fixer upper journey, click on the links below.
🪵🪚 CUSTOM TRIM FOR VAULTED CEILING AND INSTALLING VINTAGE CHANDELIERS 🏚🕯️
💪🏼🧰 BUILDING CUSTOM TRIM FOR WINDOWS AND DOORS IN OLD LITTLE COTTAGE 🌲🏚


